Planting Bulbs
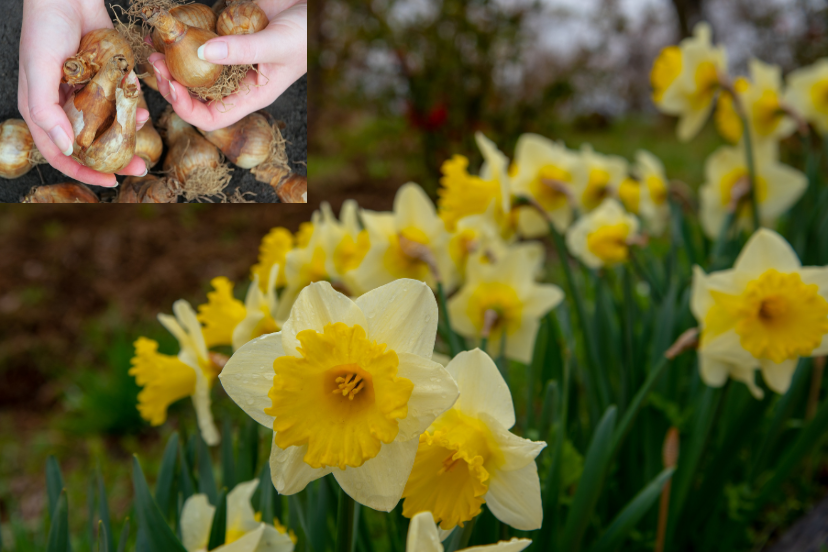
As an avid gardener, I understand the joy that comes with watching bulbs burst into vibrant blooms. Planting bulbs is a rewarding experience that can fill your garden with color and fragrance. Why not inject some color into your garden design in late winter with crocuses and snowdrops? Now is also the time to plant daffodils and tulips to brighten your spring. In this guide, I’ll share my insights and tips on planting bulbs successfully, helping you create a stunning garden that blooms year after year. If you have a smaller garden or balcony, bulbs can be planted in containers and pots, but make sure there is plenty of drainage.
Understanding Bulbs
Before you start planting bulbs, it’s essential to understand what they are. Simply they are underground storage organs that contain everything a plant needs to grow and bloom. It always amazes me that from a small ‘unit’, such vibrant and often tall flowers can grow, Nature is truly wonderful!
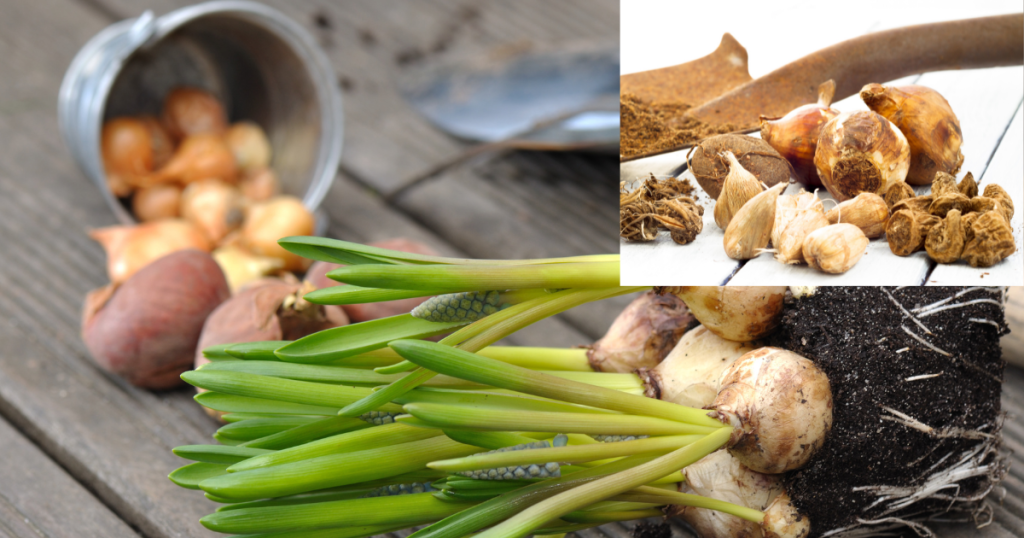
The word ‘bulb’ not only covers ‘true bulbs’ like daffodils, but includes rhizomes, corms and tubers.
Corms:
- Corms are bulb-like underground storage organs with a swollen, solid stem base.
- They store energy and nutrients for the plant’s growth.
- Examples of flowering plants with corms include:
- Crocus: Known for its colorful spring blooms, including purple, yellow, and white varieties.
- Gladiolus: Grown for its tall spikes of vibrant, sword-shaped flowers.
- Cyclamen: Admired for its decorative, heart-shaped foliage and pink or white blooms.
Tubers:
- Tubers are thickened, fleshy underground stems used for storing starch and energy.
- They often have “eyes” from which new shoots can emerge.
- Examples of flowering plants with tubers include:
- Dahlia: Known for its diverse, showy flowers in various colors and shapes.
- Begonia: Appreciated for its lush foliage and bright, cascading flowers.
Rhizomes:
- Rhizomes are horizontal, underground stems that spread horizontally.
- They give rise to new shoots and roots along their length.
- Examples of flowering plants with rhizomes include:
- Iris: Renowned for its elegant, sword-like leaves and striking, multi-colored blooms.
- Lily of the Valley: Loved for its fragrant, bell-shaped white flowers.
- Canna Lily: Grown for its tropical-looking foliage and vibrant, upright flowers.
Understanding these distinctions is vital for gardeners and horticulturists as it influences how these plants are cultivated and propagated.
The two main planting times for bulbs are firstly the fall/autumn for spring flowering varieties such as tulips, daffodils, crocus, hyacinth and snowdrops. Secondly springtime for summer flowering varieties such as dahlias, lilies, eucomis, crocosmia, begonia, agapanthus, gladioli, freesias and alliums.
Choosing the Right Bulbs
Selecting the right bulbs is crucial for a successful garden. Consider factors like your climate, soil type, and the amount of sunlight your garden or the intended planting area receives. Some bulbs might require different growing conditions, so do your research and choose bulbs that suit your garden conditions.
Buy bulbs from a reputable source e.g. a specialist nursery or garden center. Bulbs should be firm to touch. Soft bulbs might indicate poor quality and should be avoided. If you need to store bulbs before planting, put them in a dry, cool, dark place with ventilation. Always ensure bulbs are dry before storing, as damp bulbs will rot.
Timing is Key
Timing is everything when it comes to planting bulbs. Spring-blooming bulbs, like tulips and daffodils, should be planted in early fall/autumn, while summer-blooming bulbs, such as gladiolus and lilies, are best planted in the spring.
Preparing the Soil for Planting Bulbs
Prepare the soil in your garden bed before planting bulbs. Bulbs prefer well-drained soil, so on heavy clay soil work in plenty of organic matter, leaf mold or grit to improve drainage. Ensure the soil is loose and crumbly to allow bulbs to grow easily. Ground that is prone to waterlogging should be avoided.
Planting Depth and Spacing
Each type of bulb has a specific planting depth and spacing requirement. Generally, bulbs should be planted at a depth that is two to three times their height. Space them according to the recommendations on the packaging. Mark where you have planted the bulbs with weatherproof labels or canes. There is nothing worse than forgetting where they are planted and accidentally damaging them when weeding or hoeing a few months later before they have broken ground!
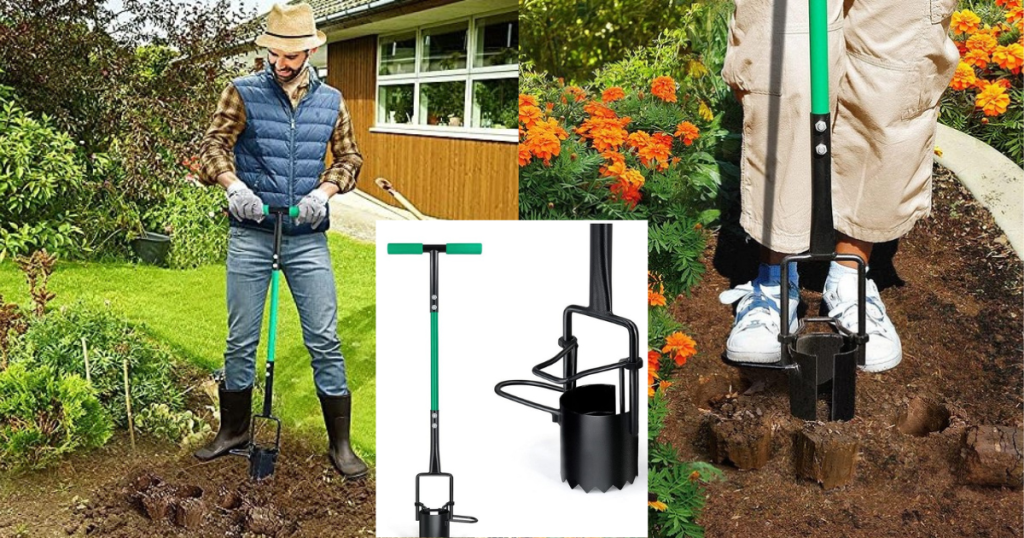
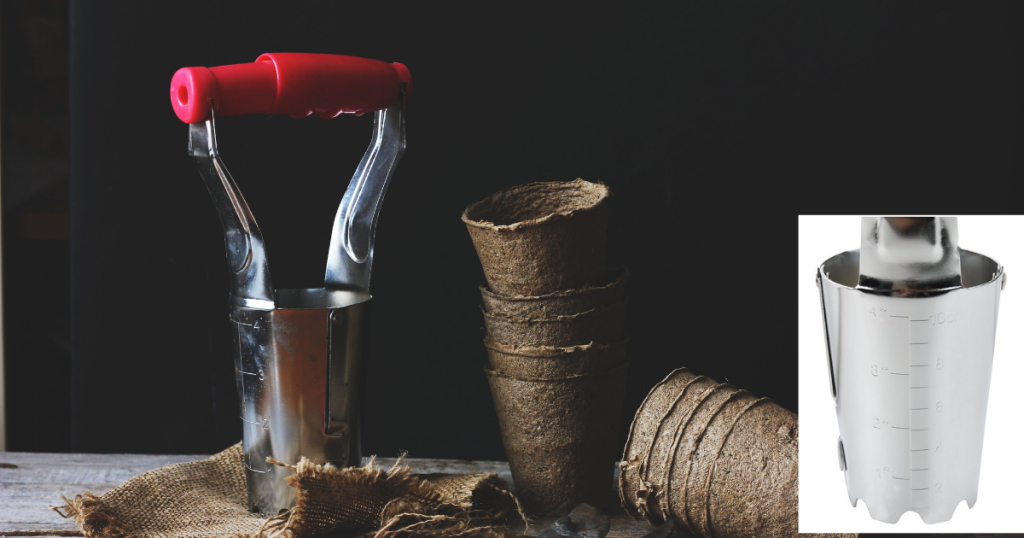
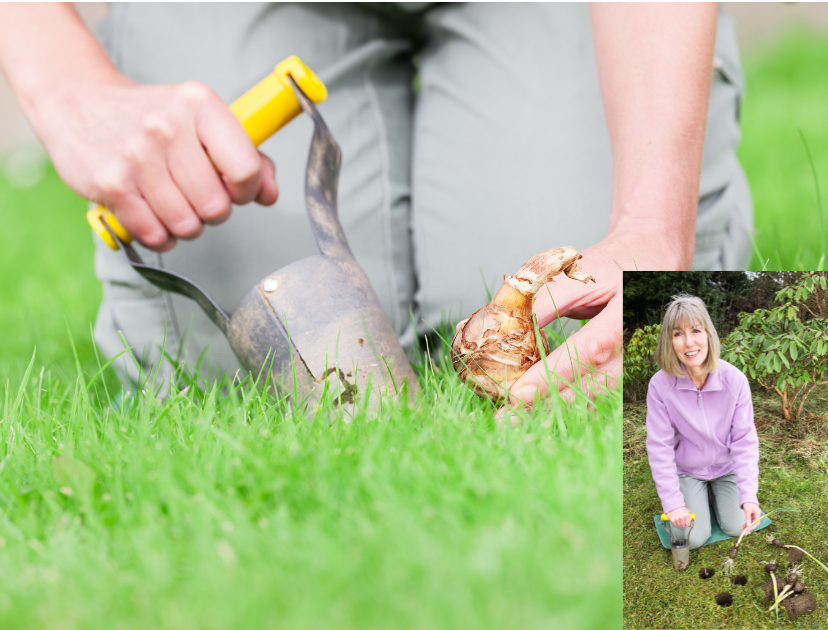
You can either use a trowel or spade to prepare the hole or consider using a short-handled special Bulb Planter with a depth mark to make the job easier. These are also available in a longer handled version that saves bending down.
Watering
After planting, water the bulbs thoroughly to settle the soil and encourage root growth. Keep the soil consistently moist but not waterlogged. Bulbs dislike sitting in water and will rot giving very poor results.
Mulching
Applying a layer of mulch such as bark over the planted area helps regulate soil temperature and conserves moisture. Mulch also prevents weeds from competing with your bulbs.
Fertilizing
Bulbs benefit from a balanced, slow-release fertilizer. Apply it at planting time and again when the foliage emerges in the spring. Avoid fertilizing after flowering, as this can lead to disease.
Dealing with Pests and Diseases
Keep an eye out for common bulb pests like squirrels and voles. Use protective measures like wire mesh or repellents to deter them. Also, watch for signs of bulb diseases and address them promptly.
Deadheading and Cleanup
After your bulbs have finished blooming, deadhead spent flowers to prevent seed production. Allow the foliage to wither naturally, as it provides nourishment for the bulbs. Do not cut back green foliage/leaves as this sometimes will cause ‘blind bulbs the following year i.e. no, or few flowers. Once the foliage dies back and turns brown, you can remove it.
Naturalizing Bulbs
Naturalizing bulbs involves letting them spread and multiply naturally. This creates beautiful, low-maintenance displays in your garden over time. Some bulbs, like snowdrops and bluebells, are excellent for naturalizing especially if you are creating a woodland style garden. If you plant bulbs in your lawn they will look great when flowering, but bear in mind the green leaves after they have bloomed and the time you should allow for the leaves to die back naturally. This can make the lawn look messy and very tempting to mow over. As mentioned before, leaves should be allowed to ‘die back’ naturally after flowering as these are food for the bulb.
Dividing Bulbs
Over time, bulbs may become overcrowded and produce fewer flowers. To rejuvenate them, dig up and divide the bulbs every few years. Replant the healthy bulbs and share or swap extras with friends or neighbors.
Storing Bulbs
If you live in an area with harsh winters, consider lifting and storing tender bulbs like dahlias and gladiolus indoors during the cold season. This will ensure they survive to bloom again next year.
Companion Planting
Planting bulbs alongside other flowers or shrubs can create stunning garden combinations. Consider the height, color, and bloom time of companion plants to complement your bulbs.
Lasagne Planting Bulbs
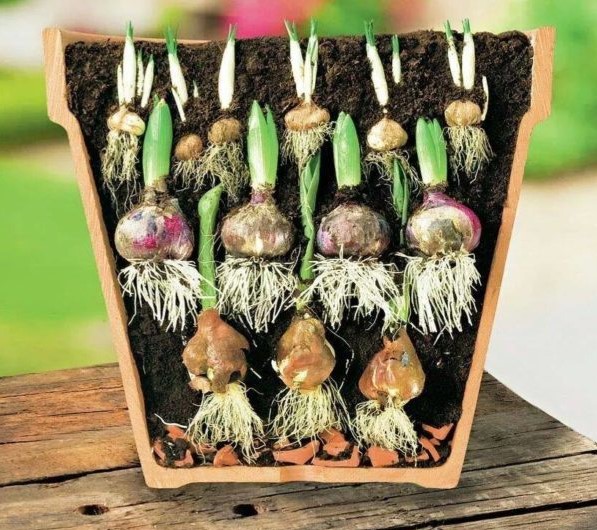
Lasagne bulb planting or layering, is a clever gardening technique that involves planting different types of flower bulbs in a single area, pot or container. By placing bulbs with varying bloom times at different depths, you can create a stunning, multi-seasonal flower display in a small area. For instance, you could plant early spring crocus bulbs at the shallowest depth, followed by tulip bulbs, and then daffodil bulbs deeper in the hole. The shallowest bulb blooms first at its designated time, followed by the next depth etc your garden comes alive with continuous bursts of color. Making lasagne bulb planting is an efficient and visually appealing way to maximize your garden’s beauty throughout the year.
if you are using pots or containers for this, ensure the compost is free draining and that the pot has plenty of drainage holes in the base. You might need to drill or enlarge these in plastic pots. Terracotta and ceramic pots should have holes already pre-cast, as you cannot easily drill these at home without probably cracking the pots. Add some crocks i.e old broken terracotta pots or gravel in the bottom of any pot or container to aid drainage.
Indoor Bulb Planting
If you’re like me and have a passion for bringing a touch of nature indoors, then you’ve probably considered growing indoor bulbs. These little wonders have the magical ability to transform any space into a blooming paradise, even during the darkest winter days. I’m going to share with you the best varieties of indoor bulbs and the optimal way to grow them, including the right growing mediums and containers.
Choosing the Best Bulb Varieties
Before diving into the nitty-gritty of growing indoor bulbs, it’s essential to select the right varieties. Here are some of my favorite choices that are sure to brighten up your indoor space:
- Amaryllis (Hippeastrum): Known for their stunning trumpet-shaped flowers, amaryllis bulbs are a favorite among indoor gardeners. They come in a range of vibrant colors and are relatively easy to grow.
- Paperwhites (Narcissus): If you want a fragrant indoor garden, paperwhites are the way to go. These bulbs produce clusters of small, white, and wonderfully scented flowers.
- Hyacinth (Hyacinthus): With their sweet fragrance and vibrant, cone-shaped blooms, hyacinths are a popular choice for indoor gardening. They come in various colors and can fill your home with a delightful aroma.
- Crocus (Crocus sativus): Crocuses are perfect for those who long for the first signs of spring. Their colorful, cup-shaped flowers emerge early in the year, bringing a burst of color to your home.
The Ideal Growing Medium and Containers
Now that you’ve chosen your bulbs, let’s talk about the right growing medium and containers. Indoor bulbs thrive when given the proper conditions.
- Potting Mix: Bulb-specific potting mix is readily available at most garden centers. It provides the perfect balance of nutrients and drainage that bulbs need. This mix ensures that your bulbs won’t rot from excess moisture.
- Containers: Opt for containers with drainage holes to prevent waterlogged soil. Decorative pots or terracotta planters work beautifully, and you can get creative with the design to match your home’s aesthetic.
- Planting Depth: As with most bulbs the general rule of thumb is to plant them at a depth that is two to three times their height. This ensures they have enough soil to root and grow properly.
- Positioning: Place your containers in a well-lit spot with indirect sunlight. Avoid direct sunlight, as it can scorch the leaves and flowers. Remember a sunny window sill even in winter can be come hot quickly.
- Watering: Keep the soil evenly moist but not soggy. Overwatering can lead to bulb rot, so be mindful of your watering schedule.
- Temperature: Most indoor bulbs prefer temperatures between 60-70°F (15-21°C). They can handle cooler temperatures at night, which can even help prolong their blooming period.
Nurturing Your Blooms
As your indoor bulbs grow, they’ll require some care to ensure a vibrant and healthy display. Fertilize your bulbs with a balanced liquid fertilizer every 2-4 weeks while they are actively growing. Pinch off any dead or yellowing leaves to maintain a tidy appearance and encourage new growth.
Growing Bulbs in Water
Growing bulbs in water can be a fascinating and low-maintenance option for plant enthusiasts and educational for children. It offers a chance to observe the plant’s root development and is a great way to add greenery to indoor spaces without soil mess. This method also allows easy control of moisture levels, promoting healthy growth. Let’s dive into this fascinating world of hydroponic bulb growing.
The Appeal of Growing Bulbs in Water
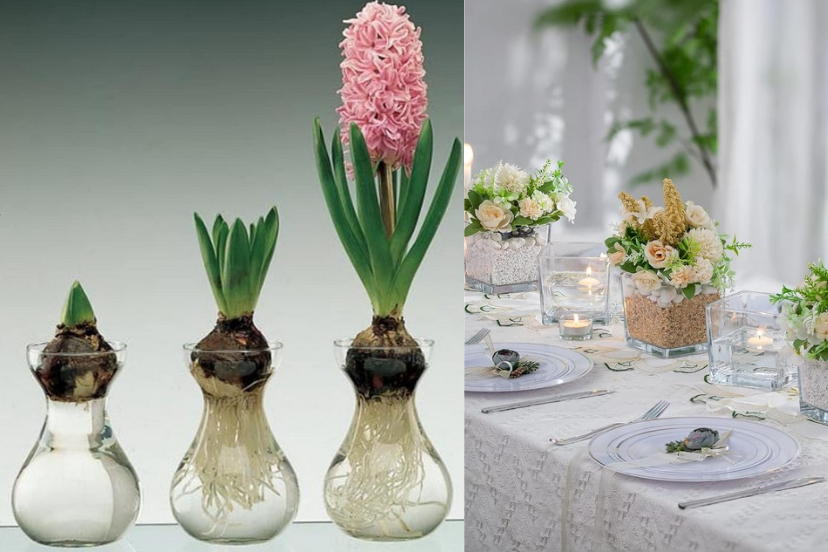
Why choose water over soil, you ask? Well, there are several compelling reasons. Firstly, it’s incredibly low-maintenance. No messy potting soil, no repotting hassle, and no worrying about overwatering or underwatering. Secondly, it’s a fantastic way to observe the intricate process of root development. You get a front-row seat to nature’s show, right in your own home. Lastly, it’s a chic and modern way to display your favorite bulbs as they grow, adding an artistic touch to your living space.
Selecting the Right Bulbs
Not all bulbs are created equal when it comes to water-based growing. For this method, you’ll want to focus on bulbs that work best without soil. Some great choices include:
- Hyacinths: These fragrant beauties thrive in water, and their vibrant colors will brighten up any room.
- Paperwhites (Narcissus): Known for their delicate white flowers and sweet fragrance. Paperwhites are perfect for water forcing.
- Amaryllis (Hippeastrum): With their striking, trumpet-shaped blooms, amaryllis bulbs are a popular choice for water culture. These can grow very tall so consider how you will support the bulb!
The Best Containers and Set-Up
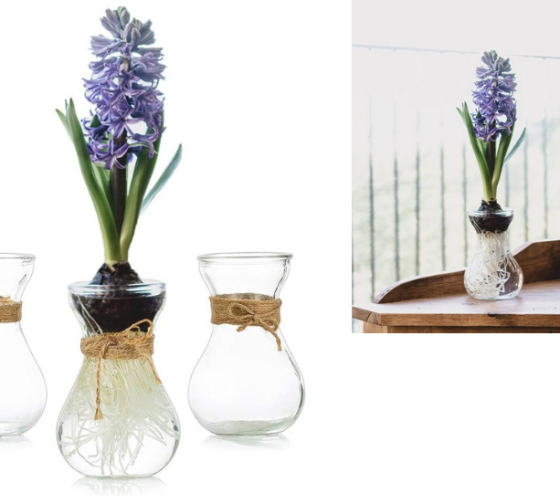
Now, let’s talk about the equipment you’ll need. You’ll want glass containers or vases to allow you to see the fascinating root development. Fill the containers with water, leaving the bulbs with either only the root zone touching the water or partially submerged. You can use pebbles or marbles to support the bulbs, ensuring they don’t topple over.
There are a variety of shapes and sizes available e.g. Round Vase Style to Square Style and more!
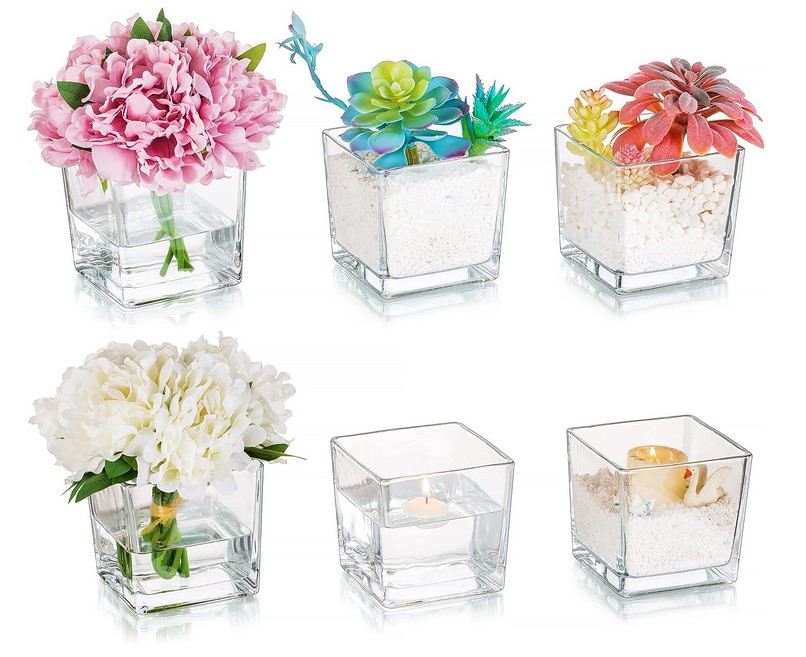
Place your containers in a bright location, ideally with indirect sunlight. This encourages healthy growth without the risk of scorching the bulbs. Remember to change the water every couple of weeks to keep it fresh and prevent mold or algae growth. Ensure the water level is constant and the roots are always in contact.
Nurturing and Watching Them Grow
As your bulbs start to grow, you’ll notice that the roots develop first, followed by the shoots and leaves. It’s like witnessing a tiny, underwater forest come to life. Be patient and enjoy the process. You can even get creative by using different-shaped containers for a unique display.
Conclusion
Growing bulbs in water is not only a captivating experience but also a simple and hassle-free way to enjoy the beauty of blooming flowers indoors. With the right bulbs, containers, and a little TLC, you can turn your living space into a stunning oasis.
Enjoying the Rewards
Finally, sit back and enjoy the rewards of your hard work. Watching your bulbs burst into bloom each season is a testament to your dedication as a gardener.
In conclusion, planting bulbs is a delightful and satisfying aspect of gardening. By understanding the types of bulbs, choosing the right ones, and following these planting and care tips, you can create a garden that bursts with color and beauty year after year.
Some of the links in posts are affiliate links. We only recommend information or products of the highest quality from resources we trust. Disclaimer
FAQs
1. When is the best time to plant spring-blooming bulbs like tulips?
- Spring flowering bulbs should be planted in early fall/autumn, ideally before the first frost.
- Summer flowering bulbs should be planted in the spring.
2. How deep should I plant my bulbs?
- Bulbs should normally be planted at a depth that is two to three times their height. Check on the packet to confirm planting instructions.
3. Can I plant bulbs in containers?
- Yes, you can plant bulbs in containers as long as the containers have proper drainage.
4. Do bulbs need fertilization every year?
- No, bulbs typically need fertilization at planting time and when foliage emerges in the spring.
5. What can I do to prevent squirrels from digging up my bulbs?
- You can use protective measures like wire mesh or squirrel repellents to deter them from your garden.
Happy planting, and may your garden bloom with the beauty of bulbs for seasons to come!
Together, we can make it- ‘Easy Peasy Gardening’ for you!
Happy gardening! 🌻